Mac and Windows Computer
Computer: Share
While the share process for Mac and Windows computers is identical, there is one difference:
- on a Mac, a window or file must be open and NOT minimized in order to be accessed for a share.
- on a Windows, a window or file must be open, but can be accessed for a share even if minimized.
1. Click anywhere on the video app window to make a menu appear at the bottom, and then click on the "Share Screen" icon.

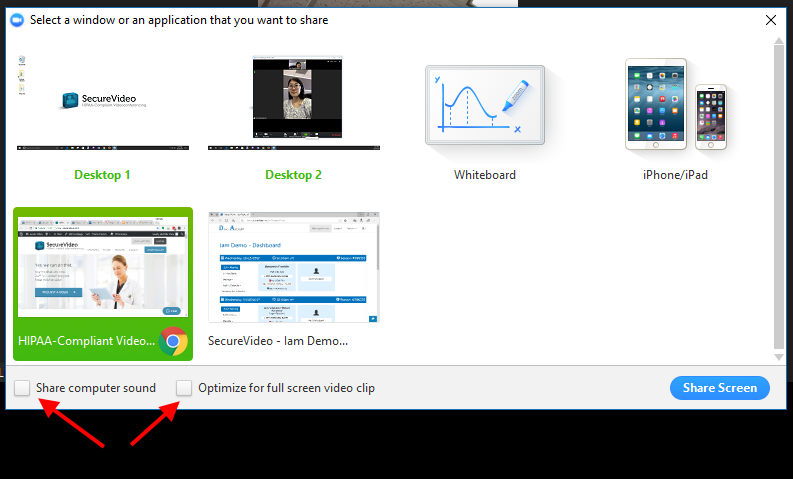
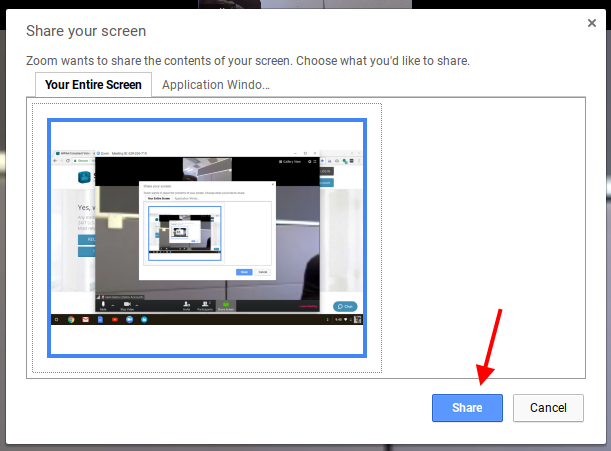
2. Select what you would like to share.
- Desktop: share your entire desktop, so that your participants see exactly what you see. (Not recommended, as it is easy to accidentally share something you do not mean to.) If you have multiple monitors, you will have the option to select any of them.
- Whiteboard: create a blank space that is shared between you and your participants, which can be collaboratively drawn on.
- iPhone/iPad: mirror the display from an iPhone/iPad connected to the same internet network as you, using Airplay. (Requires installing a plugin on your computer, and confirmation on the iPhone/iPad.)
Then click "Share Screen" in the lower right hand corner. The area you are sharing will become outlined in a green box, as a reminder that it is being shared. The video windows on the call will be shrunk.
- Note: If playing a video (e.g., YouTube page or a locally stored video file), be sure to check the box next to "Share computer sound" in the lower left hand corner to ensure proper audio.
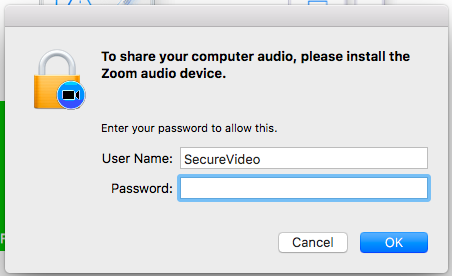
If you have a Mac computer, and want to share computer sound, you will be prompted to install the Zoom audio device.
- This prompt refers to the same information you use to log into your computer when you first turn it on. Please enter the password and click "OK" to proceed.
Computer: Share a 2nd Camera
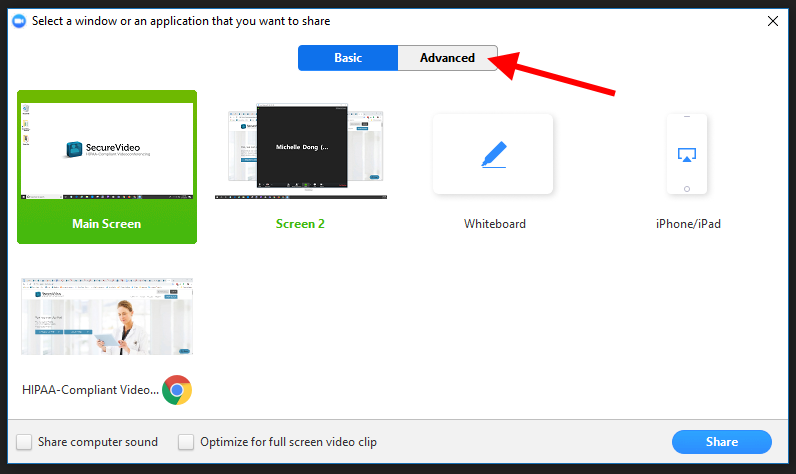
1. Click anywhere on the video app window to make a menu appear at the bottom, and then click on the "Share Screen" icon.
2. On the window that appears, click on the "Advanced" tab.
3. Click on the icon for "Content from 2nd Camera", and then click the "Share" button.
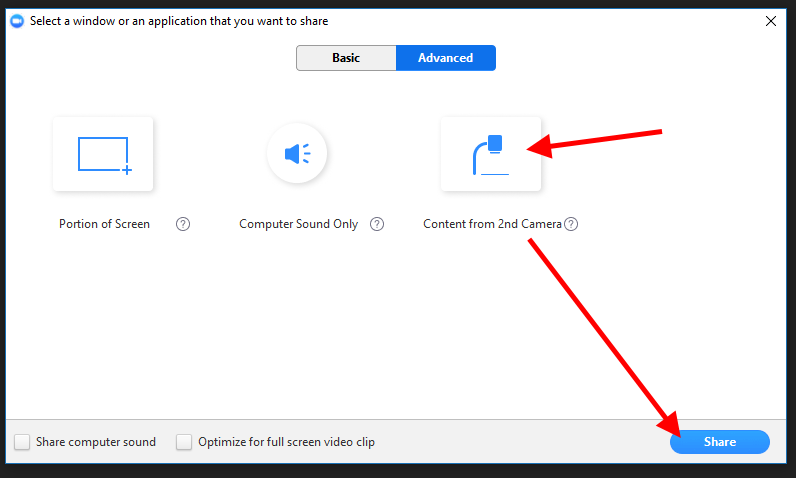
4. The video feed will be visible to your participants through the share feature.
- Your participant may find it easier to view both your main camera and shared 2nd camera by using Side-by-side mode
Computer: Annotate
1. To draw on the window/screen you've just shared, click on the "Annotate" button.

2. This will cause a number of drawing tools to appear:

- Mouse: Turns your mouse back into a cursor so that you can interact normally with the shared screen (e.g., click on links, etc.).
- Select: Select and move a drawn segment.
- Text: Type text, in the color selected. (Click away from the textbox when finished, so that other participants can view your text.)
- Draw: Allows you to draw freestyle. (Will also display different line types you can draw with.)
- Spotlight:
- Spotlight: Add a halo (of the selected color) around your cursor to help spotlight certain areas of the shared screen.
- Arrow: Create an arrow-stamp on an area to remain highlighted.
- Eraser: Click on previously drawn segments to erase them.
- Format: Change the color, line width, font size/attribute of other drawing tools.
- Undo: Undo your last action.
- Redo: Redo an undone action.
- Clear:
- Clear All Drawing: Clears all drawings.
- Clear My Drawing: Clears everything that you have drawn.
- Clear Other's Drawing: Clears everything that other participants have drawn.
- Save: Saves a screenshot of the annotated screen to the Zoom folder in your Documents folder.
Computer: Give/Stop Remote Control
Note: remote mouse control is not supported on Chromebooks. You will not be able to share mouse control if your participant is using a Chromebook.
1. You can grant mouse control of your shared screen to another person by clicking on "Remote Control" and selecting the participant's name.

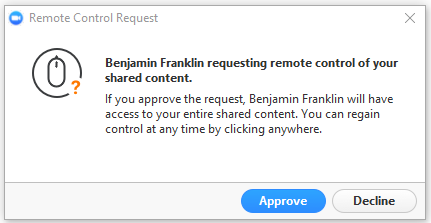
2. If a participant requests control first, you'll see the message below. Click "Approve" to grant mouse control.
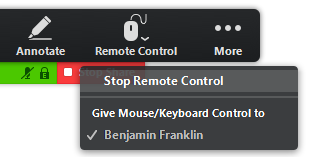
3. To take back your mouse control, click on "Remote Control" and select "Stop Remote Control".
- You can also click anywhere with your mouse to immediately take back control, and then click "Stop Remote Control" to revoke control entirely. Please note that if they click their mouse afterward before you click "Stop Remote Control", they will take back control of the mouse.
Computer: Stop Share
1. When you want to stop sharing screen, you would click on the "Stop Share".
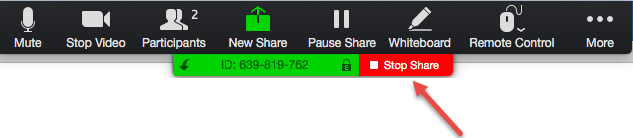
Or if you want to share a different screen, you can click "New Share". This will replace your current share.

Tablet: Android
Android Tablet: Share
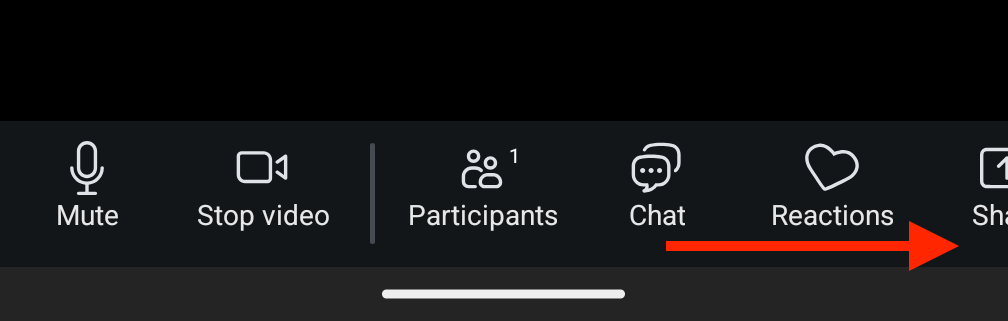
1. Tap anywhere on the screen, and a menu should appear at the bottom of the screen. Tap "Share". You may have to scroll to the side in case the option is not immediately visible.
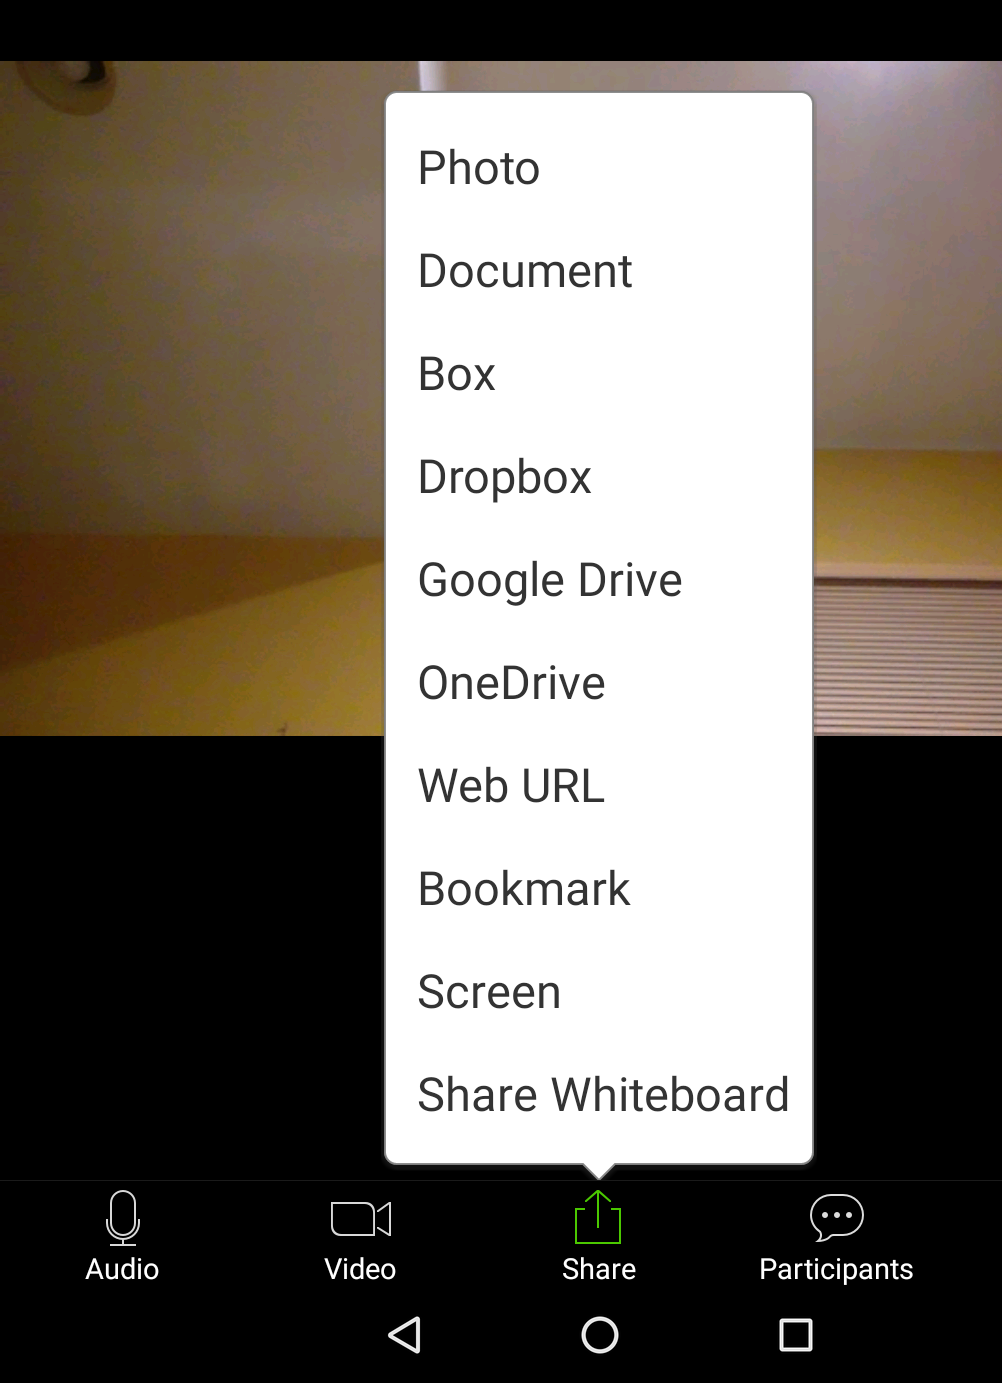
2. Tap to select the content type you would like to share. Depending on the size of your tablet, you may need to scroll down to view the whole list:
- Photo
- Document
- Box
- Dropbox
- Google Drive
- OneDrive
- Web URL
- Bookmark
- Screen: share your Android screen (participants will see exactly what you do)
- Share Whiteboard: create a whiteboard that can be seen and edited by all participants
Android Tablet: Annotate on Screen Share
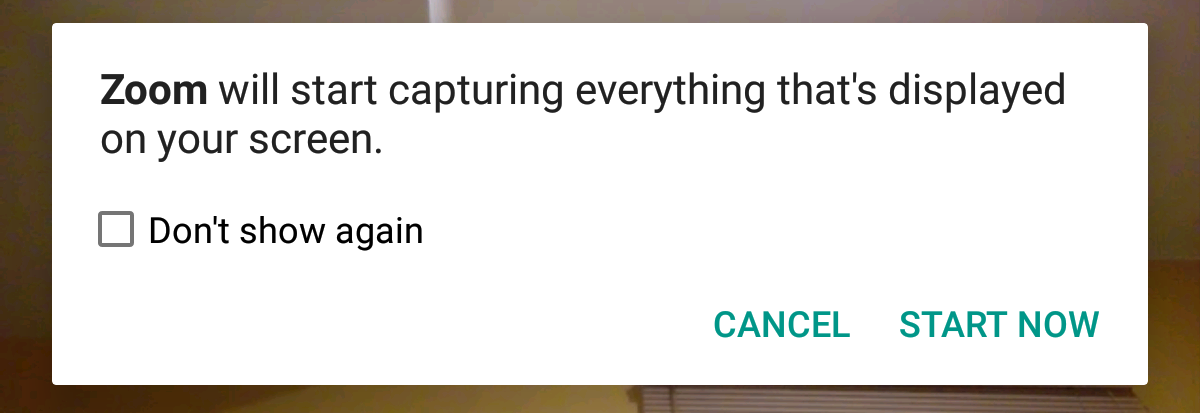
3a. If you select Screen, you'll see a prompt asking for permission to begin streaming your phone screen. Tap "Start Now" to allow it.
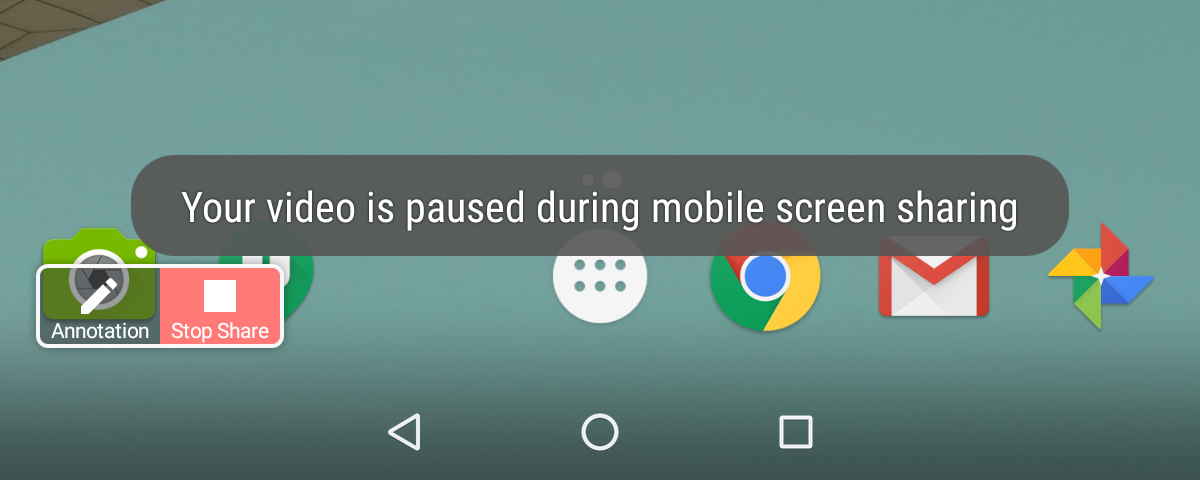
4a. You'll be taken immediately to your homescreen, which all participants will be able to view.
- Participants will not be able to view the video feed of you for the duration of the screen sharing.
- Touch and hold the "Annotation" button to drag the tool panel around.
- Tap the "Annotation" button to expand the tool panel for annotation options.
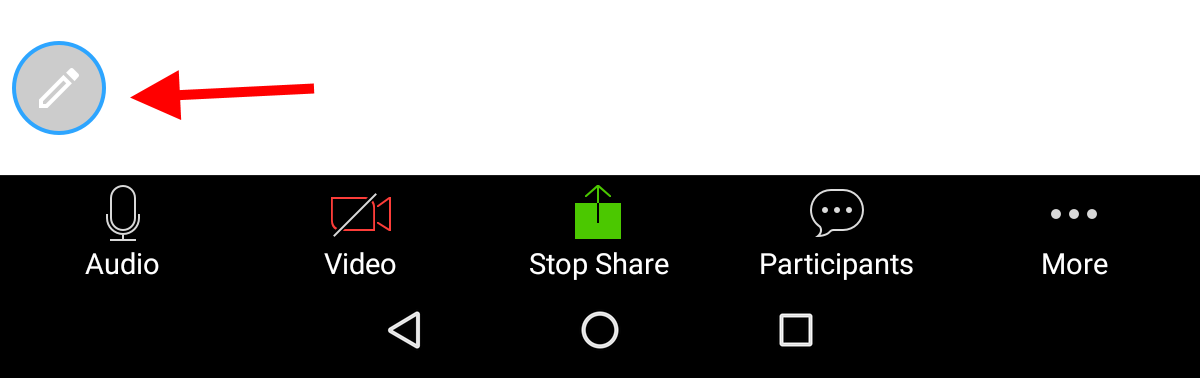
5a. Tap on a tool to select it and begin using. (Tap on the pencil icon on the left at any time to stop using tools and be able to tap on the screen on the screen normally.)

- Spotlight: Add a halo (of the selected color) around your cursor to help spotlight certain areas of the shared screen.
- Pen: Draw freestyle.
- Highlighter: Draw as though with a highlighter marker.
- Line: Draw straight lines.
- Rectangle: Create rectangles.
- Oval: Create ovals.
- Undo: Undo your last action.
- Redo: Redo an undone action.
- Clear: Clears all drawings.
- Color: Change color or line width of other drawing tools.
- Stop Share: Stop screen share.
Android Tablet: Annotate on Whiteboard
3b. If you selected Whiteboard, the screen will go blank and your video feeds will disappear. Tap on the pencil icon in the lower left hand corner to access annotation tools.
- Participants will not be able to view the video feed of you for the duration of the screen sharing.
4b. Tap on a tool to select it and begin using. (Tap on the pencil icon on the left at any time to stop using tools and be able to tap on the screen on the screen normally.)

- Spotlight: Add a halo (of the selected color) around your cursor to help spotlight certain areas of the shared screen.
- Pen: Draw freestyle.
- Highlighter: Draw as though with a highlighter marker.
- Line: Draw straight lines.
- Rectangle: Create rectangles.
- Oval: Create ovals.
- Text: Type text with device keyboard, in the color selected. (Click away from the textbox when finished, so that other participants can view your text.)
- Color: Change color or line width of other drawing tools.
- Eraser: Click on previously drawn segments to erase them.
- Undo: Undo your last action.
- Redo: Redo an undone action.
- Clear: Clears all drawings.
Android Tablet: Stop Share
1. Tap on the pencil icon to shrink the drawing tools.
2. Tap on the "Stop Share" button at the bottom of the screen.

Tablet: iPad
iPad: Share
While you cannot share your screen directly from an iPad, you can share a few different types of content, or create a whiteboard.
1. Tap anywhere on the screen, and a menu should appear at the top of the screen. Tap "Share Content".

2. Select the content type you would like to share. To create a whiteboard, select "Whiteboard" at the bottom. The whole list:
- Screen
- Photos
- iCloud Drive
- Website URL
- Bookmark
- Whiteboard
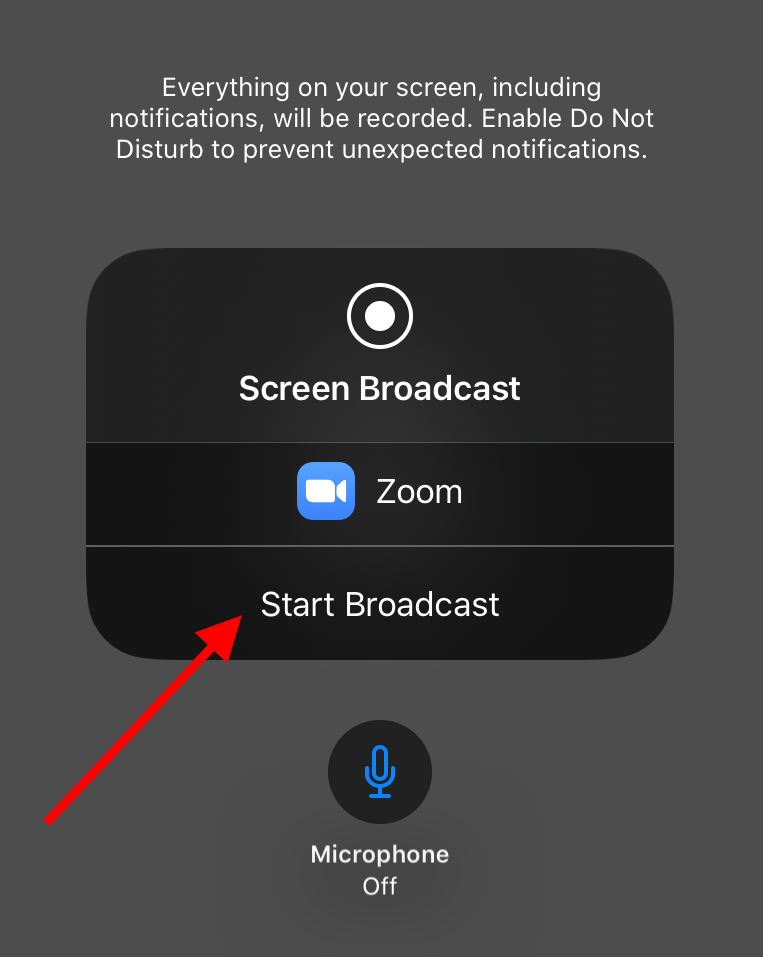
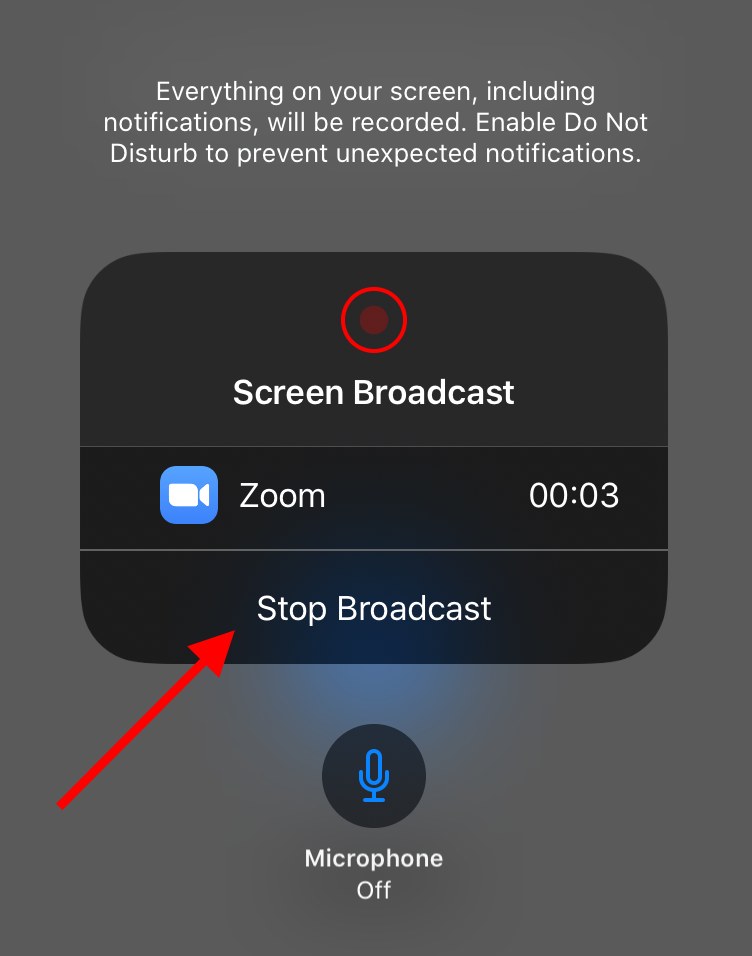
3. You can select"Screen" to share your entire screen as well as its audio. A prompt will appear to "Start Broadcast" which will start broadcasting your screen, even after you leave the Zoom app (and can move into a browser or video file or anything else you want to show within your session). To stop sharing, return to the Zoom app and click "Stop Broadcast".
4. Whiteboard, the screen will go blank and your video feed will be minimized to the bottom right-hand corner.
- Click on the "plus" icon to expand the video window to show video feeds for all participants at the bottom of the screen.
- Click on the "minus" icon to shrink the video windows entirely. A tiny Zoom-camera icon will appear in the lower right hand corner instead--click on that to return the video feeds at any time.
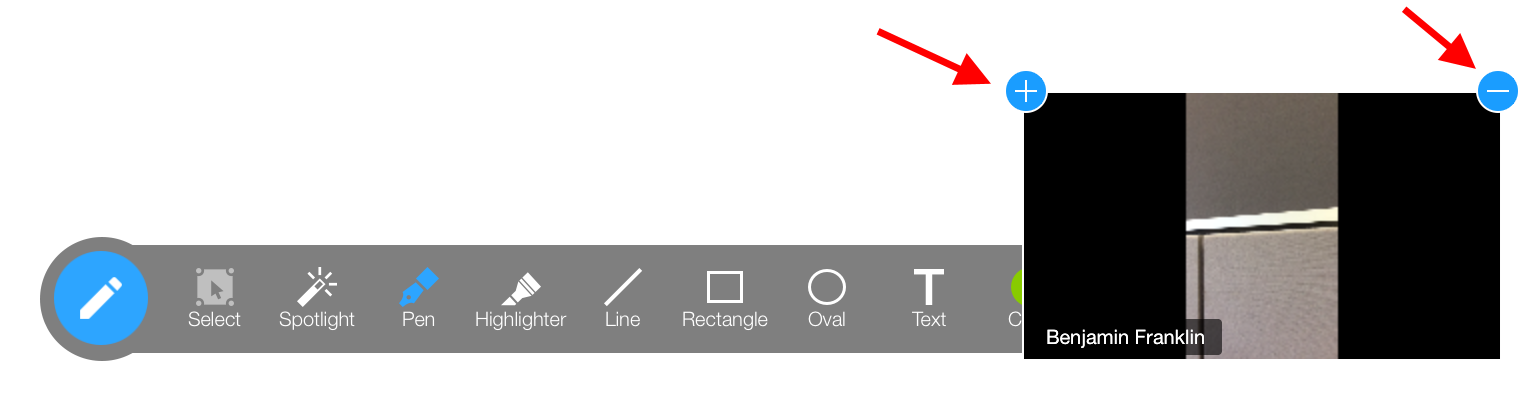
iPad: Annotate
1. Tap on a tool to select it and begin using. (Tap on the pen icon on the left at any time to stop using tools and be able to tap on the screen on the screen normally.)

- Select: Select and move a drawn segment.
- Spotlight: Add a halo (of the selected color) around your cursor to help spotlight certain areas of the shared screen.
- Pen: Draw freestyle.
- Highlighter: Draw as though with a highlighter marker.
- Line: Draw straight lines.
- Rectangle: Create rectangles.
- Oval: Create ovals.
- Text: Type text with device keyboard, in the color selected. (Click away from the textbox when finished, so that other participants can view your text.)
- Color: Change color or line width of other drawing tools.
- Eraser: Click on previously drawn segments to erase them.
- Format: Change the color, line width, font size/attribute of other drawing tools.
- Undo: Undo your last action.
- Redo: Redo an undone action.
- Clear: Clears all drawings.
iPad: Stop Share
1. Tap on "Stop Share" at the top to stop sharing.

Phone: Android
Android Phone: Share
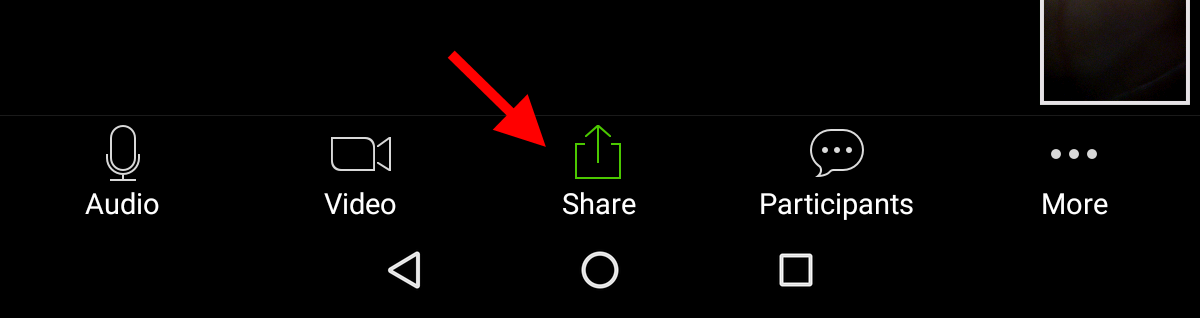
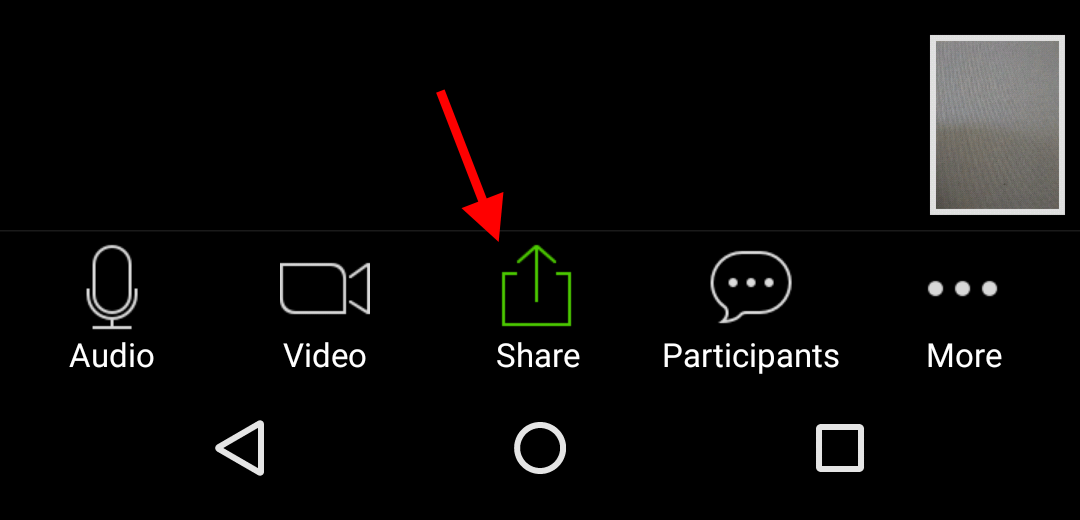
1. Tap anywhere on the screen, and a menu should appear at the bottom of the screen. Tap "Share".
(In case the "Share" icon is not immediately visible, you may need to hold down the area and scroll to the side to select the feature).
 .
. 
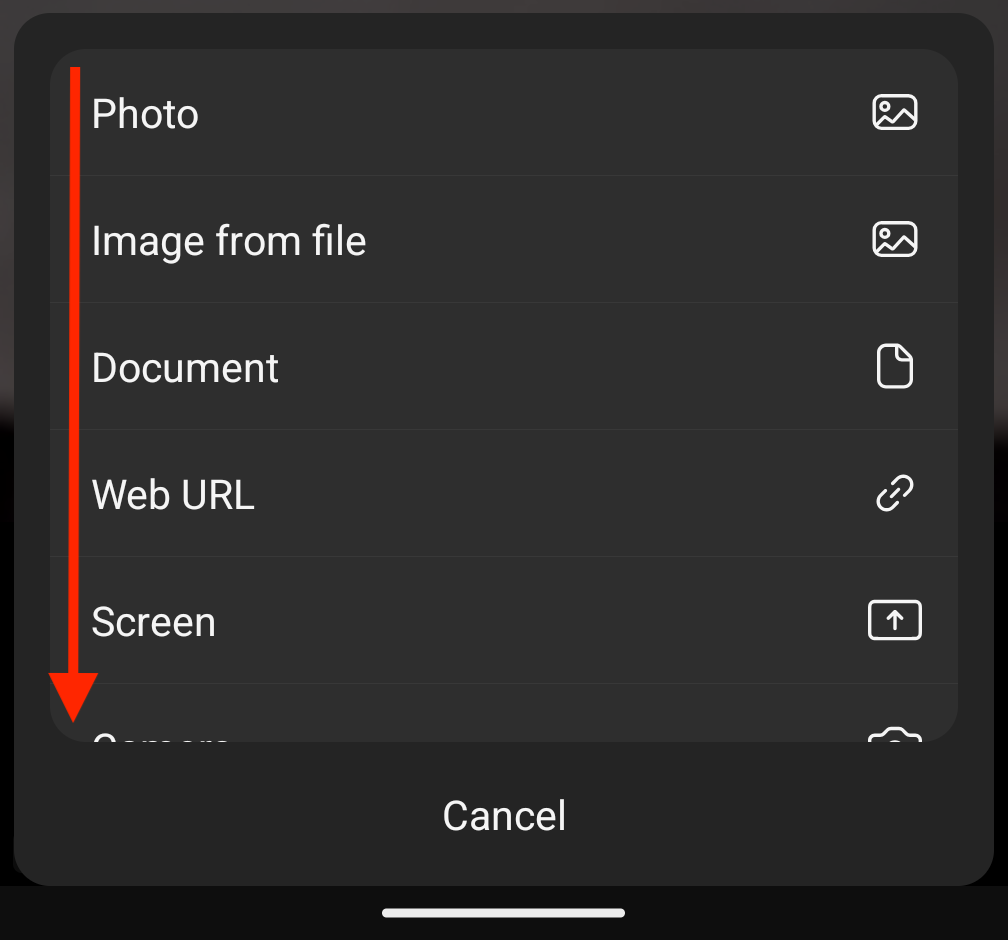
2. Tap to select the content type you would like to share. Depending on the size of your phone, you may need to scroll to view the whole list:
- Photo
- Image from file
- Document
- Web URL
- Screen share your Android screen (participants will see exactly what you do)
- Camera
- Share Whiteboard: create a whiteboard that can be seen and edited by all participants
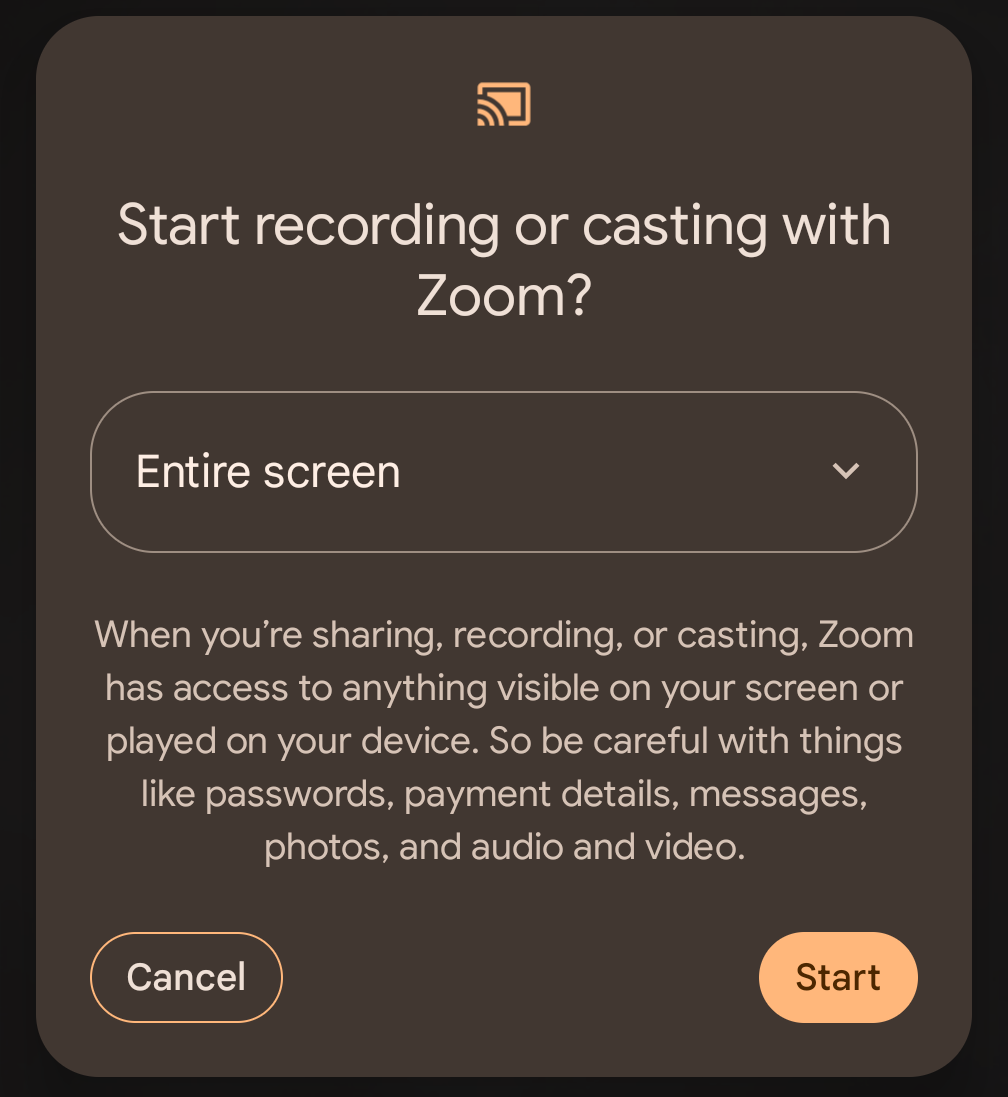
3a. If you select Screen, you'll see a prompt asking for permission to begin streaming your phone screen. Click "Start" to allow it.
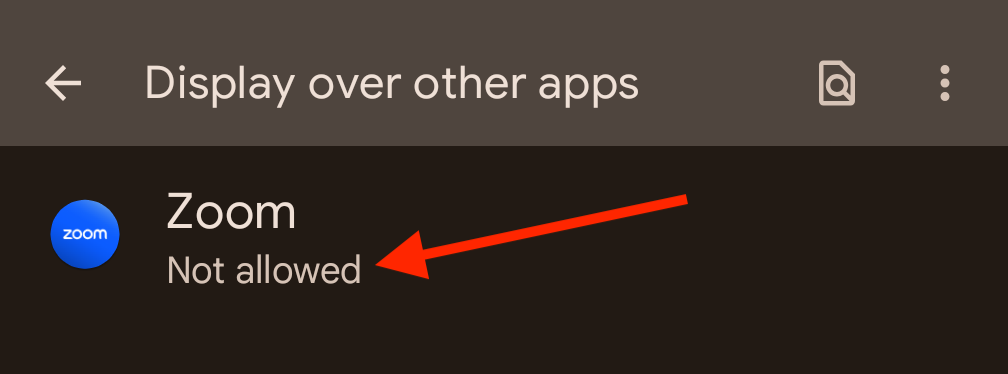
This will open up your permissions (called "Display over other apps") and you will need to scroll down to find and select "Zoom".
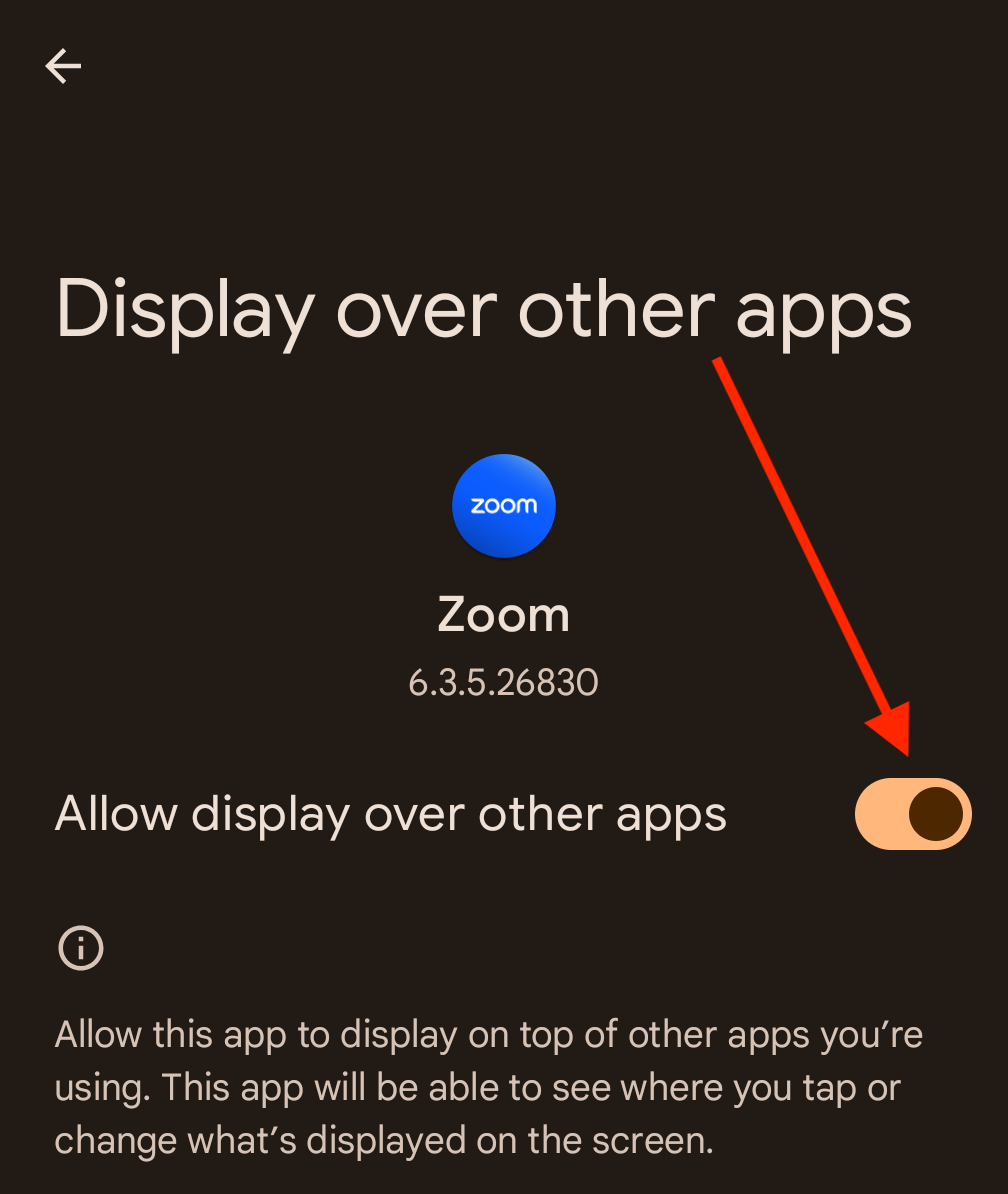
Once selected, click to enable it.
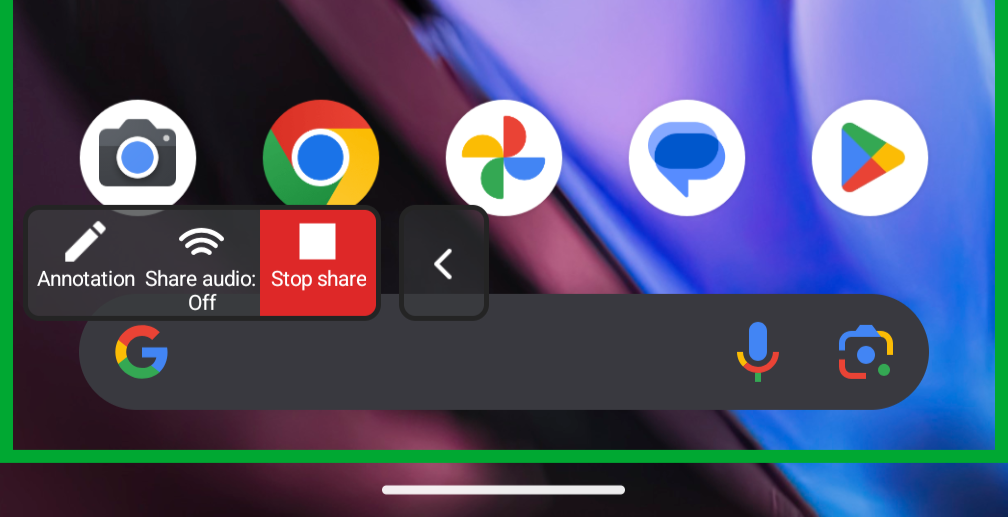
3b. You'll be taken immediately to your homescreen, which all participants will be able to view.
- Participants will not be able to view the video feed of you for the duration of the screen sharing.
- Touch and hold the "Annotation" button to drag the tool panel around.
- Tap the "Annotation" button to expand the tool panel for annotation options.
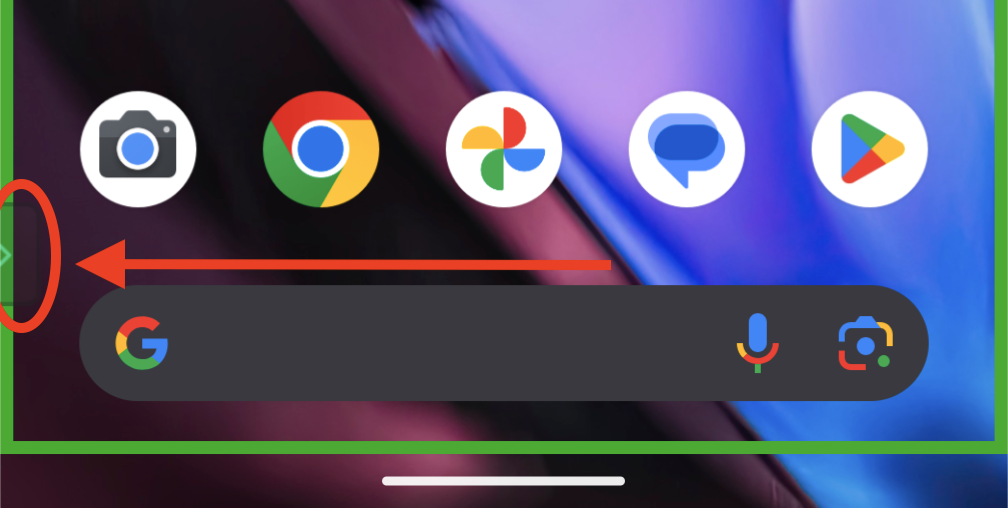
- In case the annotation menu becomes hidden or collapsed, you can re-expand it by clicking the barely noticable arrow on the edge of your screen.
Android Phone: Annotate on Screen Share
3c. While sharing your screen, click the "Annotation" button. In case the menu is hidden or collapsed, you can re-expand it by clicking the arrow on the bottom left edge of the screen.
4. Tap on a tool to select it and begin using. (Tap on the pencil icon on the left at any time to stop using tools and to click on the screen normally.)

- Spotlight: Display a red dot on the shared screen at all times. Use this to point out parts of the screen to other participants.
- Pen: Draw with a pen. This option also allows you to make shapes and change the thickness of the lines.
- Highlighter: Draw as though with a highlighter marker.
- Undo: Undo your last action.
- Redo: Redo an undone action.
- Clear: Clears all annotations
- Color: Change color or line width of other drawing tools.
- Stop Share: Stop screen share.
Android Phone: Annotate on Whiteboard
1. If you selected Whiteboard, the screen will go blank and your video feed will be minimized to the bottom right-hand corner. Tap on the pencil icon in the lower left hand corner to access annotation tools.
- Participants will not be able to view the video feed of you while you are screen sharing.
2. Tap on a tool to select it and begin using. Tap on the red X to close the annotation menu. (This will not close the Whiteboard Sharing.)

- Select: Move or resize your annotations. To select several annotations at once, click and drag your mouse to display a selection area.
- Pen: Draw with a pen. This option also allows you to make shapes and change the thickness of the lines.
- Spotlight: Display a red dot on the shared screen at all times. Use this to point out parts of the screen to other participants.
- Eraser: Click and drag to erase parts of your annotation.
- Undo: Undo your latest annotation.
- Redo: Redo your latest annotation that you undid.
- Clear: Delete all annotations.
- Save: Save shared screen / whiteboard and annotations as a PNG or PDF.
- X: Close the annotation menu
Android Phone: Stop Share
1. To stop share, close the Annotation tools panel and tap on the "Stop Share" button at the bottom of the screen. You may need to swipe to the left to find this button.
Phone: iPhone
iPhone: Share
While you cannot share your screen directly from an iPad, you can share a few different types of content.
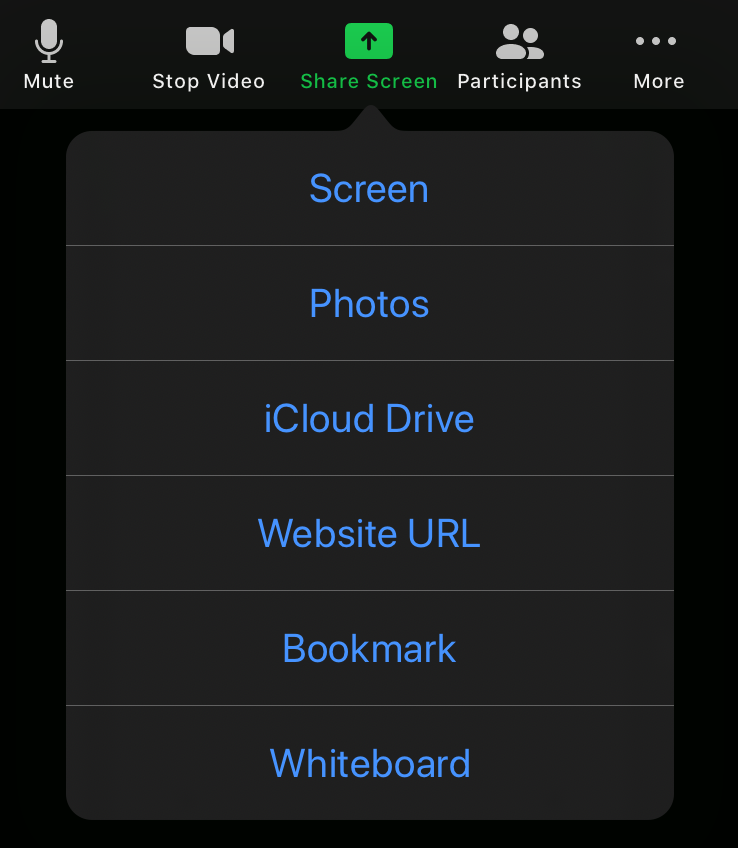
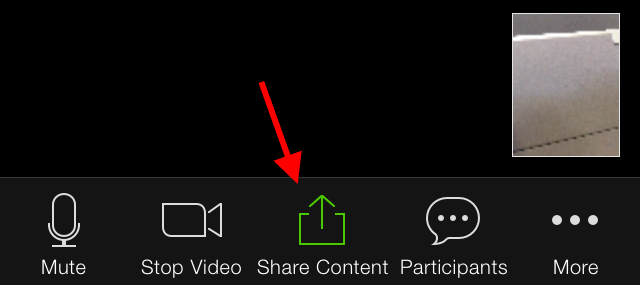
1. Tap anywhere on the screen, and a menu should appear at the bottom of the screen. Tap "Share Content".
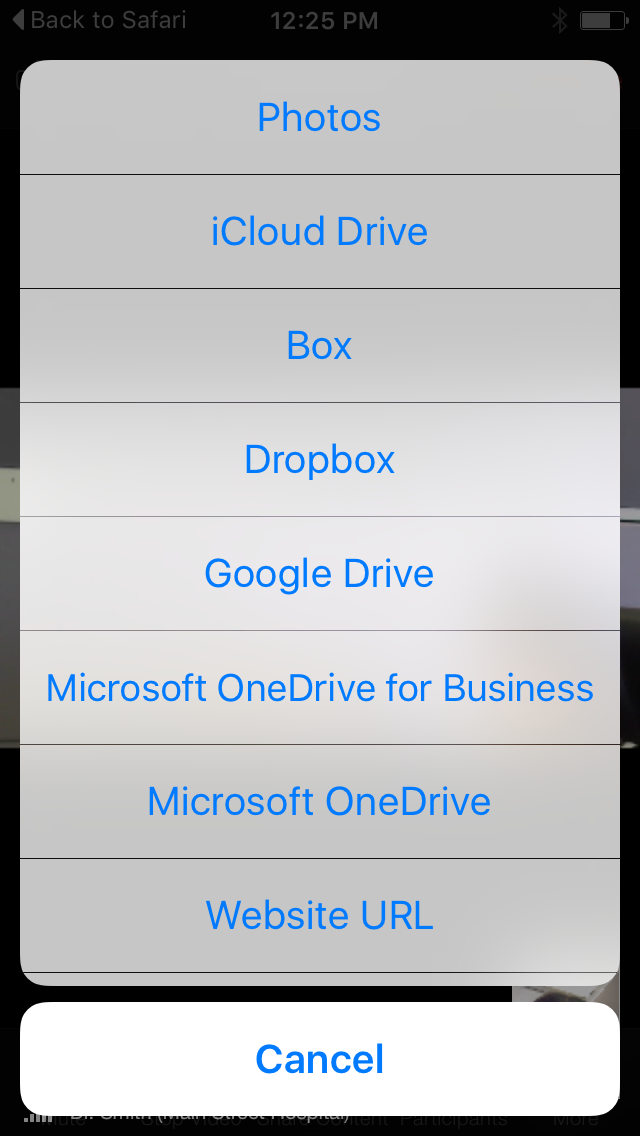
2. Tap to select the content type you would like to share. Depending on the size of your phone, you may need to scroll to view the whole list:
- Photos
- iCloud Drive
- Box
- Dropbox
- Google Drive
- Microsoft OneDrive for Business
- Microsoft OneDrive
- Website URL
- Bookmark
iPhone: Annotate
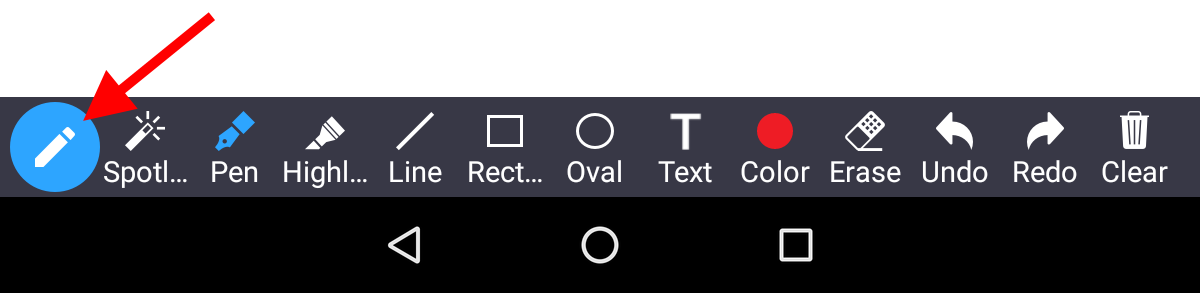
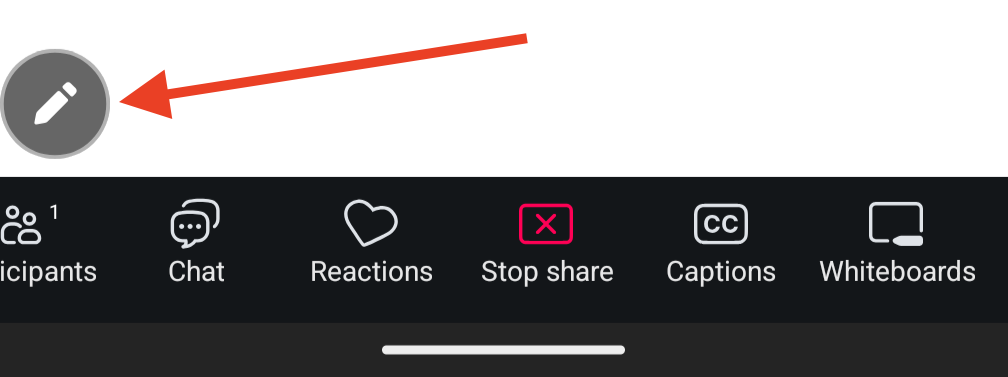
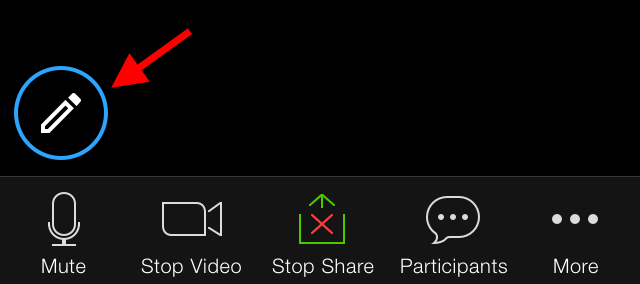
1. Your selection will appear as a static image or text. Tap on the pencil icon in the lower left hand corner to access annotation tools.
2. Tap on a tool to select it and begin using. (Tap on the pen icon on the left at any time to stop using tools and be able to tap on the screen on the screen normally.)
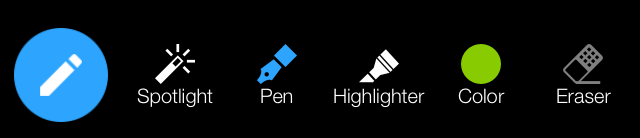
- Spotlight: Add a halo (of the selected color) around your cursor to help spotlight certain areas of the shared screen.
- Pen: Draw freestyle.
- Highlighter: Draw as though with a highlighter marker.
- Color: Change color or line width of other drawing tools.
- Eraser: Click on previously drawn segments to erase them.
iPhone: Stop Share
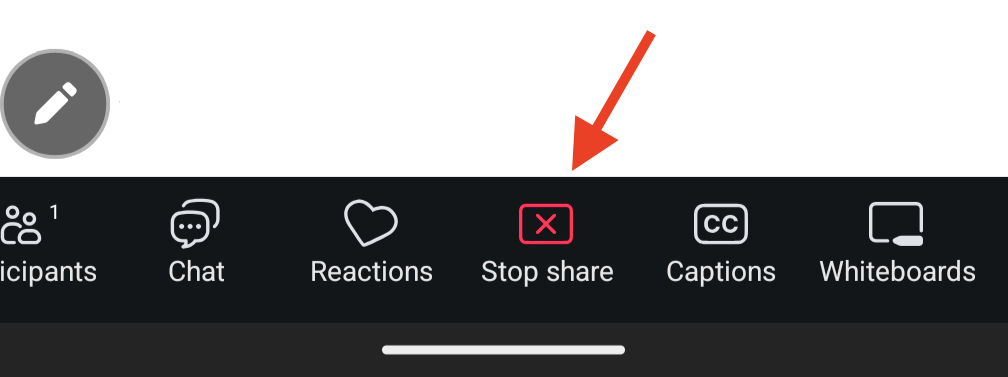
1. To stop share, close the Annotation tools panel and tap on the "Stop Share" button at the bottom of the screen.

Chromebook
Chromebook: Share
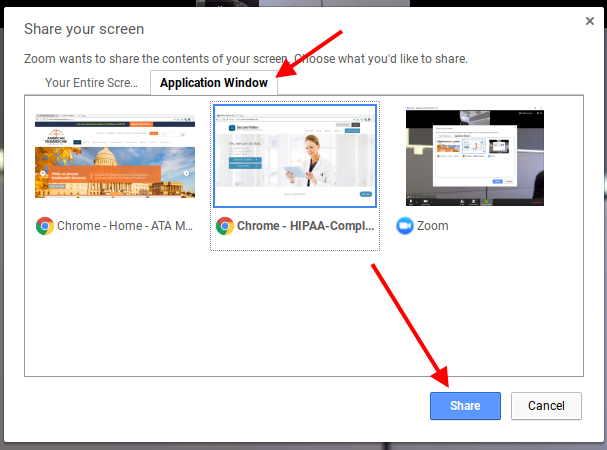
1. Click anywhere on the video app window to make a menu appear at the bottom, and then click on the "Share Screen" icon.

2. You can share either your entire desktop (left image) or click on the tab for a specific application window and select that (right image).
Chromebook: Stop Share
1. To stop share, tap on the "Stop Share" button at the top of the screen.

This article was last reviewed by our Support team on January 14, 2025.