E-Documents is a customizable feature allowing organizations to easily build forms for users to complete electronically. While E-Document users often include patients and clients, they may also be used by the host of the session. Users with an Account Administrator or Clinical Supervisor role can create/edit as many templates as needed, and delete templates as well. Common uses for these E-Documents include intake forms and patient care forms. For a good overview of this feature, please see the video recording of a webinar we hosted on e-documents.
This support article illustrates how a host can fill out e-documents on the account.
You may also be interested in:
Assigning a document packet to a host
Hosts and schedulers can assign a document packet to themselves after scheduling a session
1. On a created meeting, click the "Manage" button.
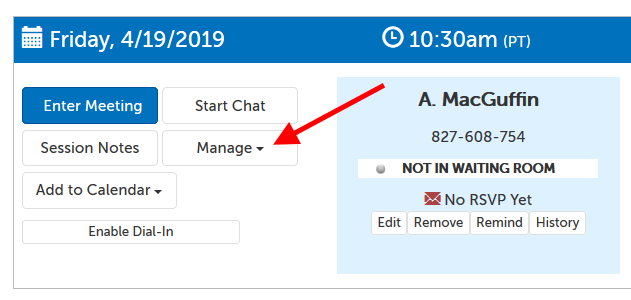
2. From the menu that appears below, select "Host Documents".
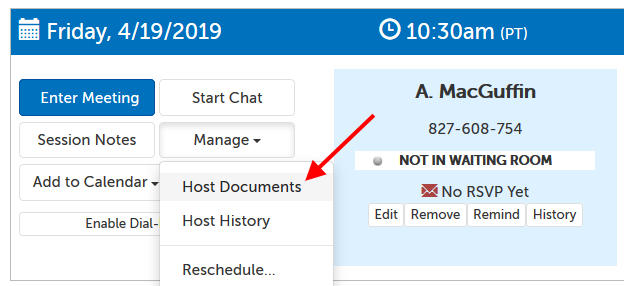
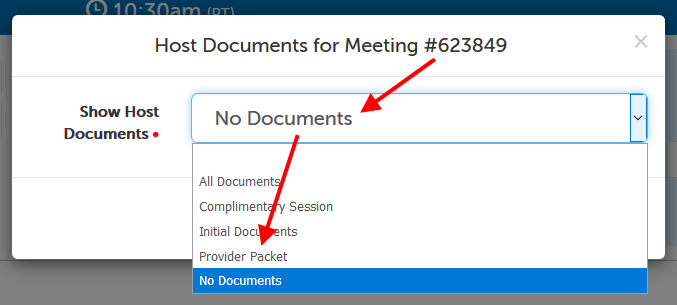
3. The default is "No Documents". Click on this name to see available packets, and then choose the document packet that you want to have available for the host to fill out.
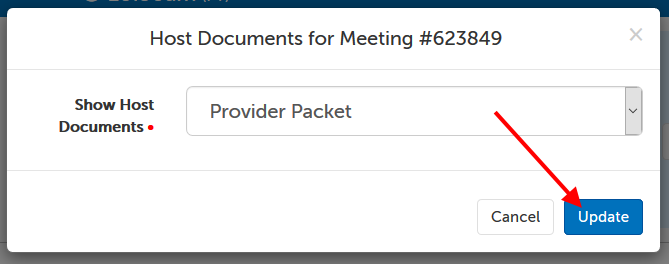
4. Click "Update" when the selection is correct.
5. Documents included in that packet (and their requirements, if any) will now appear to the host below the session panel.
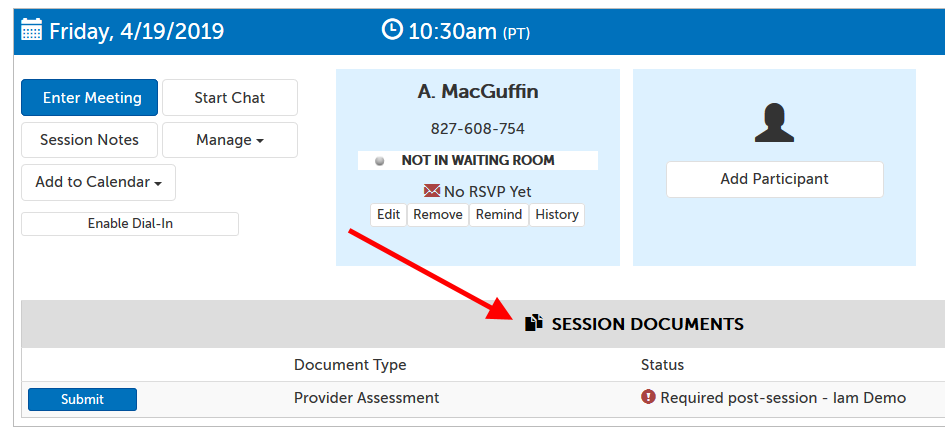
6. If the document is required pre-session, the host will need to click the "Submit" button to fill out the document before the host is allowed to enter the session. If the document is required post-session, the dashboard will redirect to the document after the host has entered the session.
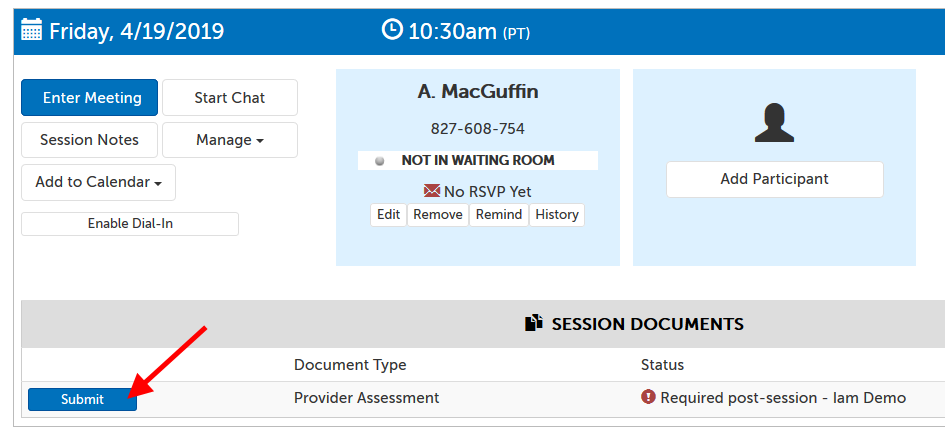
Assigning a document packet to a host
A host (or scheduler) can also unassign a document packet from themselves.
1. On a created meeting, click the "Manage" button.

2. From the menu that appears below, select "Host Documents".

3. Change the packet selection to "No Documents", and click "Update".
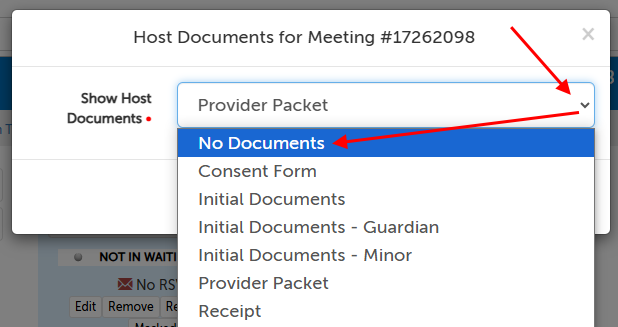
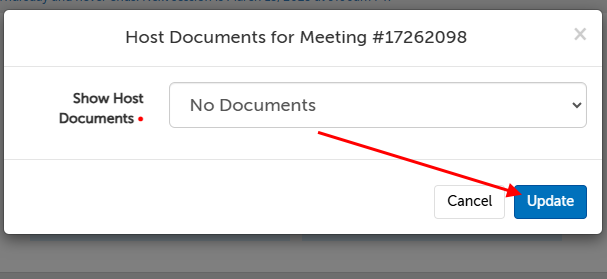
4. The assigned document packet will have been removed from the host.
This article was last reviewed by our Support team on January 13, 2025.